
I went after a little puddle of candle wax in my bathroom grout with hot water and a brush, and it turned into a shiny film that seemed to spread with every pass.Once I stopped scrubbing and let the wax chill and harden, it lifted in chunks instead of smearing deeper into the line.Only then did a quick soap-and-warm-water wipe make the leftover residue finally let go.
Candle wax on tile is annoying. Candle wax in grout lines can feel impossible. The good news is that most wax problems come down to doing the steps in the right order, and using gentler tools than you think.
The goal is simple: remove the hard wax first, then treat what is left behind (usually an oily film or dye). If you try to “scrub it out” right away, you can drive wax deeper or rough up grout so it stains faster next time.
Why candle wax sticks to tile grout
Tile itself is usually smooth and non-porous (especially glazed ceramic or porcelain). Grout is different: cement-based grout has tiny pores that grab wax and hold onto oils. Even epoxy grout can keep a thin residue on the surface, especially if the wax was warm when it spilled.
Wax cleanup works best when you treat it like a two-part mess:
- Part 1: the hardened wax you can lift and scrape.
- Part 2: the leftover oily residue and any dye from colored candles.
Before you start: identify your grout and seal status
A quick check helps you pick the safest method and avoid discoloration.
Quick grout ID
- Cement grout (most common): slightly rough, porous, may darken when wet.
- Epoxy grout: smoother, more stain-resistant, often found in newer installs or higher-end bathrooms.
Is your grout sealed?
Do a simple water drop test in an inconspicuous spot.
- Put a few drops of water on clean, dry grout.
- If it darkens quickly, it is likely unsealed or the sealer has worn off.
- If the water beads and stays lighter for a minute or two, it is likely sealed.
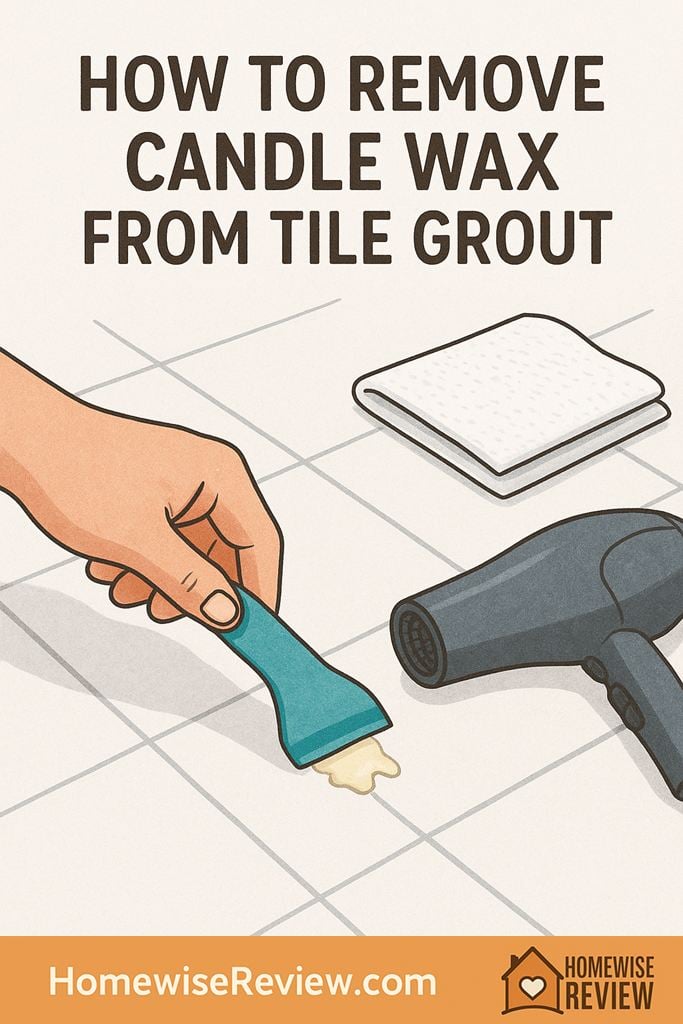
Gather tools (keep it gentle)
- Plastic scraper, old gift card, or plastic putty knife
- Paper towels or clean cotton rags
- Ice pack or a zip-top bag of ice
- Hair dryer (or an iron with care, see below)
- Soft toothbrush or grout brush (nylon)
- Mild dish soap and warm water
- Optional: baking soda (for a paste), rubbing alcohol, or mineral spirits (spot testing required)
Wax removal methods compared (choose the least aggressive that works)
| Method | Best for | What you need | Main risk |
|---|---|---|---|
| Cold and lift | Thick wax blobs on tile and along grout edges | Ice pack, plastic scraper | Chipping grout if you pry too hard |
| Gentle heat and blot | Wax sitting in grout texture and corners | Hair dryer, paper towels | Overheating and spreading wax farther |
| Warm soapy wash | Light residue after bulk removal | Dish soap, warm water, brush | Not strong enough for oily film alone |
| Targeted solvent spot clean | Stubborn oily film after scraping | Rubbing alcohol or mineral spirits, cotton swabs | Can dull some finishes or affect sealer if overused |
| Steam (carefully) | Wax caught in grout texture, especially epoxy grout | Handheld steam cleaner, towels | Too much heat and moisture can weaken failing grout or old sealer |
Step-by-step: remove wax from the tile surface first
Always start on the tile face. If you melt wax while there is still a thick layer on the tile, it can run into grout lines and make your job harder.
Option A: Chill and lift (best for blobs)
- Place an ice pack or bag of ice over the wax for 5 to 10 minutes.
- Use a plastic scraper to lift the hardened wax. Keep the edge flat and slide under the wax rather than prying upward.
- Wipe up loose pieces immediately so they do not re-smear when warmed.
Tip: If wax is straddling tile and grout, scrape from tile toward grout gently. Avoid digging down into the grout line.
Option B: Heat and blot (best for thin films)
- Lay a folded paper towel over the wax.
- Warm the area with a hair dryer on low to medium for 15 to 30 seconds.
- Press the towel to absorb softened wax. Replace towels as they load up.
Do not point high heat directly into grout lines for long stretches. Slow and controlled is safer than “hot and fast.”
Step-by-step: remove wax from tile grout lines
Once the tile looks clean, you can focus on the grout. The trick is to soften wax just enough to lift it, then clean the residue that makes grout look dark or greasy.
Step 1: Lift what you can without heat
- Use a plastic scraper or an old credit card to skim across the grout line.
- Brush lightly with a dry toothbrush to pop out small crumbs of wax.
- Vacuum or wipe away debris before moving on.
Step 2: Soften and blot (controlled heat)
This is the safest “go-to” for most grout lines.
- Place a strip of paper towel over the grout line.
- Warm with a hair dryer on low for 10 to 20 seconds at a time.
- Press the towel down to absorb wax, then lift straight up.
- Repeat until the towel stops picking up wax.
If you want to use an iron: Use the lowest setting, keep it moving, and only touch the paper towel, not the tile. Ironing directly on tile can crack some surfaces and can soften certain sealers.
Step 3: Wash away the oily film (soap first)
Even when wax looks gone, grout can still hold an oily residue that attracts dirt.
- Mix 1 to 2 teaspoons dish soap into 2 cups warm water.
- Dip a toothbrush or nylon grout brush in the solution and scrub the grout line for 30 to 60 seconds.
- Wipe with a damp cloth, then dry with a clean towel.
How to tell if you need more cleaning: If the grout darkens again after it dries, there is likely still residue present.
Step 4: Spot treat stubborn residue (only if needed)
If soap and water do not cut the greasy look, step up carefully. Always test in a hidden spot first and keep the product on the grout, not pooling on surrounding surfaces.
- Rubbing alcohol (isopropyl): Dampen a cotton swab or folded paper towel and dab the grout. Let it sit for 30 seconds, then scrub lightly and rinse.
- Mineral spirits: Effective for paraffin residue, but use sparingly, ventilate, and keep away from open flames. Dab, do not soak. Rinse well with soapy water afterward.
Important: If your grout is sealed, heavy solvent use can reduce water beading. If you notice that, plan to reseal after everything is fully dry.
Step 5: If wax left a stain, brighten safely
Colored candle wax can leave dye behind. Before you reach for harsh bleach, try a mild abrasive paste that is easier on grout.
- Make a paste of baking soda + a little water (thick like toothpaste).
- Apply to the stained grout and let it sit for 5 to 10 minutes.
- Scrub gently with a toothbrush, rinse, and dry.
If the stain is still there after two rounds, you may be dealing with dye that penetrated unsealed grout. At that point, a grout-specific cleaner or a grout colorant may be the more realistic fix.
What not to do (so you do not damage grout)
- Do not use metal scrapers or razor blades on tile edges near grout. A small slip can scratch tile or gouge grout.
- Do not flood grout with boiling water. It can soften wax and push it deeper, and it can stress older grout.
- Avoid vinegar on cement grout for routine cleaning. Acid can etch cement grout and make it rougher over time.
- Skip abrasive powders on glossy tile. They can dull the finish around the grout line.
- Do not mix cleaners (especially anything containing bleach or ammonia). If you are unsure, rinse and dry before trying a new product.
Special situations (and how to adjust)
Wax on textured tile or penny tile
- Use the heat and blot method with smaller paper towel pieces so you can press into texture.
- Follow with a soapy scrub using a soft brush to remove film from the tile texture.
Natural stone tile (marble, travertine, slate)
Stone can be sensitive to acids and some solvents. Start with cold and lift, then soap and water. If you are unsure about a solvent, do not use it. Test every step, and keep heat low to avoid stressing the stone or sealer.
Old, crumbly, or cracked grout
If grout is already failing, aggressive scraping and repeated steam can make it crumble. Use the gentlest heat-and-blot approach and plan for a small grout repair if needed. Sometimes a wax spill is what reveals grout that was already ready for touch-ups.
Preventing the next wax-in-grout moment
A few small habits can save a lot of cleanup time, especially in bathrooms and on kitchen tile.
- Use candles on a tray or shallow dish that is wider than the candle base.
- Trim wicks so candles burn cleaner and drip less.
- Keep grout sealed if you have cement grout in splash-prone areas. A good sealer buys you time when spills happen.
- For frequent candle use, consider flameless candles in areas with lots of grout lines (like penny tile).
Worth Knowing Before You Buy
Hot water and a brush make the mess worse. On porous cement grout, heat and scrubbing turn wax into a slick film that gets pushed deeper into the grout line. The fix is the order: remove the hardened wax first, then use limited heat and soap only on the thin oily residue left behind.
Bottom Line
Remove candle wax from tile grout by lifting the hardened wax first, then using controlled heat to blot what is trapped in the grout texture. Finish with a soapy scrub to remove oily residue, and only move to a spot solvent if you still see darkness after drying.
See also
If you want a fast way to choose the right method for any household spill, start with our stain-rescue decision tree, and for a similar wax cleanup on smooth surfaces, see how to remove candle wax from glass.
- Dupray Neat steam cleaner review for grout and tile jobs
- Rowenta steam station review for controlled heat and blotting
- Method all-purpose cleaner review for everyday residue cleanup
Frequently Asked Questions ▾
Can I use vinegar to remove candle wax from grout?
It is not a great choice for cement grout. Vinegar is acidic and can slowly etch cement-based grout, making it rougher and more stain-prone. Stick with scraping, blotting, then a mild soapy wash, and spot-treat residue only if needed.
Why does the grout look darker after the wax is gone?
That is usually oily residue left behind, not “wax chunks.” Clean with warm water and dish soap, scrub lightly, rinse, and let it dry fully. If it still dries darker, a small amount of rubbing alcohol on a swab can help lift the film.
Will a steam cleaner damage tile grout?
Steam can be helpful, but too much heat and moisture can weaken already failing grout or degrade older sealer. Use short passes, keep the nozzle moving, blot immediately with a towel, and stop if you see grout sand coming loose.
Do I need to reseal grout after removing wax?
Not always, but it is worth re-checking with the water drop test once the area is completely dry (often 24 hours). If water soaks in quickly, resealing will help protect against future candle drips and everyday staining.
As an Amazon Associate, we earn from qualifying purchases made through links on our site.