
Lingering coffee smells, cloudy lids, and mystery gunk under the gasket can make even a favorite Yeti cup feel gross. Use this straightforward routine to get your tumbler truly clean without damaging it.
Why cleaning your Yeti cup correctly matters
Yeti cups are built to keep drinks hot or cold for hours, which also means they hold onto whatever is left inside. Coffee oils, milk, smoothies, and flavored powders can all leave a sticky film that traps odors and bacteria. If you only give the cup a quick rinse, that residue builds up and can affect taste and hygiene.
The lid and gasket are the most common hidden trouble spots. They sit right where you sip, but they are also full of tiny crevices where moisture and sugars can sit for days. A good routine targets the stainless steel cup, the lid, the gasket, and any straw pieces so everything that touches your drink is actually clean.
Know your Yeti cup before you start
Most Yeti cups and tumblers use 18/8 stainless steel on the inside, sometimes with a powder coated color on the outside. The lids are usually clear plastic with a movable slider and a removable rubber or silicone gasket that seals the top. Some models include a straw or a different style of lid, but the cleaning basics are similar.
Look at the bottom of your cup and inside the lid for any care symbols. Many newer Yeti Ramblers are top rack dishwasher safe, but some older models were labeled hand wash only. When in doubt, hand wash the cup and lid and save the dishwasher for the occasional deep clean.
What you need to safely clean a Yeti cup
Most of the time, you can get a Yeti cup spotless with simple supplies you already own. You do not need harsh chemicals, and in fact, they can damage the stainless steel or the gasket over time.
- Mild dish soap
- Warm to hot tap water
- A soft bottle brush or long-handled sponge
- A small detail brush or old soft toothbrush for the lid and gasket
- A narrow straw brush if you have a straw lid
- Baking soda (for stains and odors)
- White distilled vinegar (for mineral deposits and deep cleaning)
- A clean dish towel or drying rack
Optional but helpful: a small bowl or cup for soaking the gasket and lid parts, and a microfiber cloth for polishing the outside of the cup.
Daily cleaning routine after each use
If you clean your Yeti cup properly after each drink, deep cleaning becomes quick and rare. This routine takes just a few minutes and prevents smells, stains, and mold in the lid.
1. Empty and rinse immediately
As soon as you finish your drink, empty any remaining liquid. Rinse the cup, lid, and straw (if you have one) with warm water. This quick rinse removes most sugars and milk proteins before they dry on and become stubborn.
If you cannot wash right away, at least fill the cup with warm water and let it sit until you can get to a sink. Even that simple step makes a big difference.
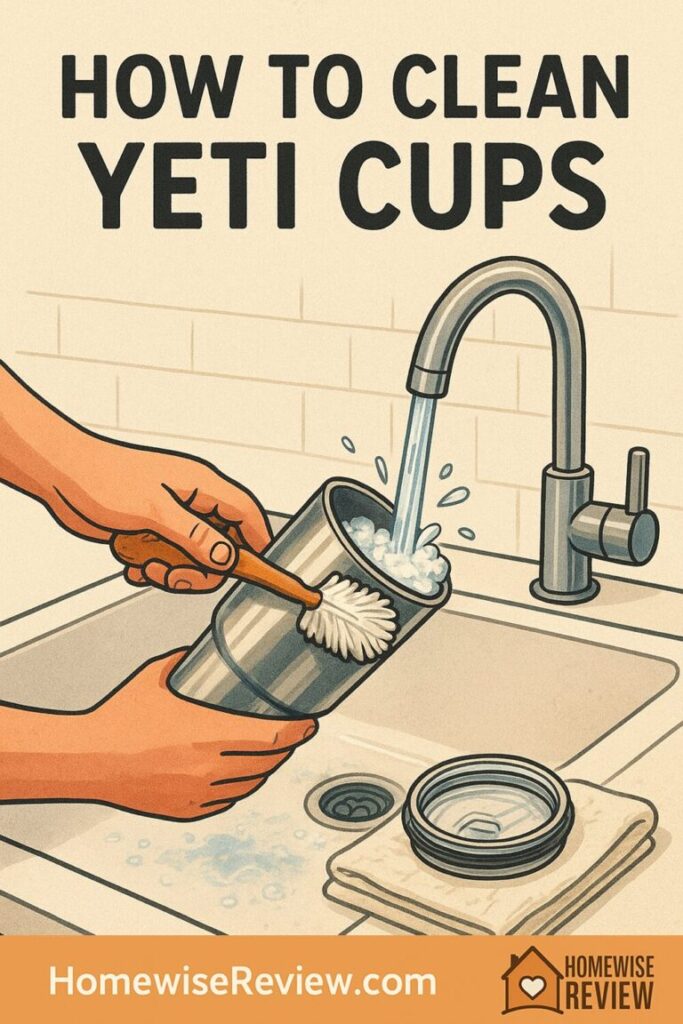
2. Wash the stainless steel cup
- Fill the cup halfway with warm water.
- Add a small squirt of dish soap.
- Use a bottle brush or long-handled sponge to scrub the interior, paying attention to the bottom seam.
- Wipe the outer rim where your mouth touches, and quickly clean the exterior if it has drips.
- Rinse thoroughly until no soap remains.
Stainless steel can handle a good scrub, but avoid steel wool or very abrasive pads that can scratch the interior. Fine scratches give residue more places to cling and can dull the finish.
3. Clean the lid and slider
- Remove the lid from the cup.
- If your lid has a magnetic slider or removable piece, pop it off according to the instructions for your model.
- Rinse the lid under warm running water.
- Add a drop of dish soap to your detail brush or toothbrush.
- Scrub all surfaces of the lid, especially grooves, edges, and the drinking opening.
- Rinse very well so no soap taste remains.
Pay extra attention around the slider track and inside any openings. These areas tend to collect coffee oils and sticky drink residue that a simple rinse will not remove.
4. Rinse or remove the gasket
Many Yeti lids include a removable rubber or silicone gasket. If you see visible buildup or if the lid has started to smell, gently pull the gasket off and wash it with soap and warm water. Even when it looks clean, moving it slightly with your fingers while rinsing can loosen trapped gunk.
Dry the gasket completely before putting it back. A damp gasket that stays in place all the time is one of the quickest ways for mold to form.
5. Clean the straw, if you use one
- Rinse the straw immediately after use with warm water.
- Push a straw brush through from both ends with a small amount of dish soap.
- Rinse until the water runs clear and there are no suds left.
Straws that hold smoothies, milk, or sweet drinks should be washed right away. If you let them sit overnight, the inside can develop film and odors that are harder to remove.
6. Let everything dry fully
Separate the cup, lid, gasket, and straw for drying. Place them on a clean dish rack or towel with good air flow. Trapped moisture is what lets mildew and bacteria grow, so it helps to leave the lid off the cup until everything is completely dry.
Weekly deep clean for stains and odors
Even with a good daily routine, coffee and tea can slowly darken the interior of your Yeti cup, and the lid can develop a faint smell. A weekly or biweekly deep clean keeps things fresh and resets any buildup.
Deep clean the stainless steel cup
- Sprinkle 1 to 2 tablespoons of baking soda into the empty cup.
- Add just enough warm water to make a loose paste and spread it over the interior with your brush.
- Let it sit for 15 to 30 minutes to break down stains and odors.
- Scrub the entire interior, especially any discolored spots.
- Rinse thoroughly until the water runs clear and no baking soda grit remains.
Baking soda is mildly abrasive and excellent at absorbing smells, but it is gentle on stainless steel. If strong coffee stains persist, you can repeat the process or move on to a vinegar soak.
Use vinegar for mineral deposits and cloudy film
- Fill the cup about halfway with warm water.
- Add an equal amount of white distilled vinegar.
- Let it soak for 20 to 30 minutes.
- Scrub lightly with your bottle brush.
- Rinse several times with plain water to remove the vinegar smell.
Vinegar helps dissolve mineral deposits from hard water and can loosen stubborn film. Do not mix vinegar and baking soda in the cup at the same time, since the fizzing neutralizes their cleaning power and can make a mess.
Deep clean the lid and gasket
- Disassemble the lid completely. Remove any slider piece, straw, and the gasket.
- Fill a small bowl with warm water and a squirt of dish soap.
- Drop in the lid and gasket and let them soak for 10 to 15 minutes.
- Use a detail brush to scrub every edge, groove, and crevice on the lid.
- Gently stretch and roll the gasket with your fingers under the soapy water so you can clean all sides.
- Rinse each piece thoroughly under running water.
- Set everything out separately to air dry.
If your lid still smells after a soapy soak, you can do a quick second soak in a mix of 1 part white vinegar to 3 parts warm water, then rinse very well.
How to deal with mold and cloudy lids
If you notice black or pink spots on the gasket, inside the lid, or in the slider track, treat it as mold and clean it thoroughly. Mold is most common when the cup is used for sugary drinks, when it is stored with the lid on while damp, or when the gasket has never been removed.
- Put on disposable gloves if mold makes you uncomfortable.
- Disassemble the lid and remove the gasket and any slider piece.
- Rinse visible debris away with warm water.
- Soak all pieces in hot, soapy water for at least 20 minutes.
- Use a small brush or toothbrush to scrub any stained or moldy areas until they look clean.
- Rinse thoroughly.
- If staining remains, repeat the soak using a solution of 1 part white vinegar to 3 parts water.
- Rinse again and let everything dry completely in open air.
If the gasket is permanently stained or still smells musty after cleaning, it is safer to replace it. Gaskets are inexpensive, and a fresh one helps your Yeti seal better and stay cleaner longer.
Dishwasher vs hand washing Yeti cups
Many Yeti cups and lids are labeled top rack dishwasher safe, and using the dishwasher can be convenient. The heat and detergent do a good job of removing oils and most residue from stainless steel and plastic. It is still important to disassemble the lid and remove the gasket before running a load so that water reaches all the hidden areas.
Hand washing has a few advantages. It is gentler on the exterior finish, gives you more control over scrubbing problem spots, and lets you inspect the lid and gasket regularly. If you use the dishwasher, try alternating with hand washing so you can catch any early mold or buildup around the gasket.
Quick pros and cons
- Dishwasher pros: Convenient, thorough on most residue, good for deep cleaning cycles.
- Dishwasher cons: Can fade or chip exterior finish over time, may not fully clean under gaskets unless they are removed.
- Hand wash pros: Gentle on finishes, lets you inspect and target problem spots.
- Hand wash cons: Takes a few extra minutes, relies on you to remember to deep clean.
What not to use on Yeti cups
The materials in a Yeti cup are durable, but some common cleaning choices can damage them or leave unsafe residue. Avoid these products and habits to keep your cup in good condition.
- Bleach and chlorine cleaners: These can pit stainless steel, damage gaskets, and leave harsh fumes and residue that are hard to rinse away.
- Oven cleaner or heavy duty degreasers: Too strong for drinkware and may affect the stainless surface or plastic lid.
- Steel wool and heavy abrasives: Can scratch the interior and exterior, making stains and odors harder to remove.
- Soaking colored exteriors in strong chemicals: May fade or damage the powder coated finish.
- Extreme temperatures: Do not boil the cup, put it in the microwave, or leave it on a hot stove. Those can damage the vacuum insulation and seals.
Sticking with mild dish soap, baking soda, and vinegar gives you plenty of cleaning power without putting the cup materials or your health at risk.
Troubleshooting common Yeti cup problems
My Yeti still smells after cleaning
Lingering smells usually mean there is still residue hiding somewhere. Repeat a baking soda deep clean for the stainless steel body, then do a careful lid and gasket soak with detailed scrubbing. Make sure each part dries completely before reassembly, and store the cup with the lid off when you are not using it.
Coffee or tea stains that will not budge
For stubborn dark stains, make a thicker baking soda paste by mixing baking soda with just enough water to spread. Apply it directly to the stained areas and let it sit for 30 minutes before scrubbing. You can also alternate a baking soda scrub with a short vinegar soak, rinsing well between each step.
Metallic taste in drinks
A metallic taste often comes from a thin film of old coffee or tea oils, or from not rinsing cleaners fully. Do a full interior scrub with baking soda and warm water, then rinse several times. Avoid leaving strongly acidic drinks, like straight lemon juice or vinegar, sitting in the cup for long periods.
White film or spots inside the cup
White spots or a dull film usually come from hard water minerals. A vinegar soak is the best fix. Fill the cup with a half vinegar, half warm water mix, soak for up to 30 minutes, scrub lightly, then rinse very well and let it air dry.
See also
If you want to switch to gentler cleaners for your drinkware and kitchen, start with our overview of best non-toxic cleaning products for families, and match them with a scrubber you like such as one from our Scrub Daddy sponges review.
- Method all-purpose cleaner for everyday kitchen messes
- Mrs. Meyer’s multi-surface cleaner for fresh-smelling counters
- Step-by-step stain rescue tips for tricky spills
FAQ
Are Yeti cups dishwasher safe?
Many newer Yeti cups and lids are labeled top rack dishwasher safe, but it is important to check the markings on your specific cup. Even if the cup can go in the dishwasher, you should remove the gasket and any slider piece from the lid so water can reach all areas. Hand washing is always a safe option if you are unsure.
How often should I deep clean my Yeti cup?
For most people, a weekly deep clean is enough, as long as you wash the cup thoroughly after each use. If you drink a lot of coffee, tea, or sweetened beverages, you may want to deep clean every few days to stay ahead of stains and odors. Any time you notice a smell or see film or spots, treat that as your cue for a deeper wash.
Can I use bleach to clean a Yeti cup?
It is best to avoid bleach and chlorine-based cleaners on Yeti cups. They can damage the stainless steel surface, degrade the gasket, and leave lingering fumes and residue that are not safe to drink from. Mild dish soap, baking soda, and vinegar give you plenty of cleaning power without those downsides.
How do I clean mold from a Yeti lid and gasket?
Disassemble the lid fully, including removing the gasket and any slider or straw pieces. Soak everything in hot, soapy water for at least 20 minutes, then scrub all surfaces with a small brush until any visible mold is gone. Rinse thoroughly, let the pieces dry completely, and replace the gasket if it still looks stained or smells musty.
Why does my Yeti cup still smell after washing it?
If your cup still smells, there is probably residue trapped under the gasket, inside the slider track, or in the straw. Take the lid apart, clean each piece individually, and use a baking soda paste on the stainless interior for a deeper deodorizing scrub. Make sure everything dries fully before you put it back together, and store the cup with the lid off when not in use.
Can I soak my Yeti cup overnight?
Soaking in warm, soapy water for several hours is generally fine for stainless steel and helps loosen stubborn residue. Avoid soaking colored exteriors or lids in very strong cleaners or bleach, since those can damage finishes and gaskets. After soaking, always scrub, rinse thoroughly, and let the cup and lid air dry.
As an Amazon Associate, we earn from qualifying purchases made through links on our site.