
Nail polish on a wood table can turn into a permanent-looking spot fast, especially if you grab the wrong remover. This guide walks you through safe, finish-friendly ways to get it off with minimal damage.
Nail polish is designed to bond hard, which is why it can cling to wood finishes and leave behind color even after the chip is gone. The good news is that most spills can be removed cleanly if you start gently, work in tiny sections, and stop the moment the table’s finish starts to soften.
Below you’ll find a safe escalation plan: first aid for fresh spills, how to figure out what finish you have, and the least risky methods to try before you ever consider acetone.
What to do immediately (fresh, still-wet polish)
Move fast, but do not smear
Wet nail polish spreads easily and can stain along the grain if you rub. Your goal is to pick it up, not push it around.
- Blot, don’t wipe: Press a clean paper towel or cloth straight down to lift liquid polish.
- Scoop the puddle: Use the edge of a plastic card or a plastic spoon to gently lift thicker polish.
- Switch to a clean area often: Each blot should use a fresh spot on the towel so you don’t re-deposit color.
- Keep it out of seams: Avoid pushing liquid toward cracks, joints, or veneer edges.
Clean the residue with mild soap
Even if the main spill is gone, you may have a slick film on the finish.
- Mix a few drops of dish soap into a bowl of warm water.
- Dampen a microfiber cloth, wring it well, and wipe the area lightly.
- Dry immediately with a second cloth.
If you still see a colored ring or rough patches where polish dried, move to the dried-polish steps below.
Before you start: identify what kind of wood surface you’re dealing with
The safest method depends on whether nail polish is sitting on a sealed finish (most dining tables) or has soaked into bare wood. You don’t need to be a furniture expert, but you do need a quick reality check before using solvents.
Quick surface check
- Sealed finish: The surface feels smooth and slightly slippery, and spills usually bead for a moment.
- Oil or wax finish: The wood looks more natural and matte, and water can darken it quickly if left sitting.
- Unfinished or worn-through: You can feel texture from the grain, and liquids darken the wood almost immediately.
Simple solvent spot tests (optional, but helpful)
If you suspect an older finish and you’re considering stronger solvents, do a hidden test first (under the table edge). Use a cotton swab, touch for 3 to 5 seconds, then wipe dry.
- Rubbing alcohol test: If the finish gets tacky, it may be shellac, which is very alcohol-sensitive.
- Acetone test: If the finish gets tacky, it may be lacquer, which acetone can damage quickly.
If either test turns the finish sticky, skip that solvent on the visible area and stick to the gentlest removal plan.
Choose your method: safest options first (comparison table)
Use this table to pick the least risky method that matches the situation. When in doubt, start at the top and move down only if you need to.
| Method | Best for | What you need | Risk to wood finish | Notes |
|---|---|---|---|---|
| Plastic scrape + soapy wipe | Fresh spills or thick blobs on sealed tables | Plastic card, dish soap, microfiber cloth | Very low | Prevents spreading; won’t dissolve polish fully |
| Warm compress + gentle lift | Dried polish sitting on top of finish | Warm damp cloth, time, plastic card | Low | Softens edges; won’t remove stain by itself |
| Non-acetone nail polish remover | Most sealed finishes with light residue | Non-acetone remover, cotton swabs, clean cloth | Low to medium | Still a solvent; use tiny amounts and move fast |
| Isopropyl alcohol (70% to 91%) | Some residues; adhesive-like film | Rubbing alcohol, cotton swabs | Medium (high for shellac) | Test first; stop if surface dulls or feels tacky |
| Acetone (last resort) | Stubborn polish on polyurethane or very durable finishes | Acetone, cotton swabs, ventilation | High (especially lacquer, shellac) | Use pinpoint dabs only; can strip or haze finishes |
| Light sanding and refinish | Polish soaked into bare wood or worn-through finish | Fine sandpaper, matching finish | High (but often necessary) | Consider a pro for veneer or valuable pieces |
Step-by-step: remove dried nail polish from a finished wood table
For most household tables (sealed with polyurethane or a similar topcoat), the safest path is mechanical removal first, then minimal solvent to lift what’s left.
Supplies checklist
- Microfiber cloths (at least 2)
- Plastic card or plastic razor blade (not metal)
- Cotton swabs and cotton pads
- Dish soap and warm water
- Non-acetone nail polish remover
- Optional: isopropyl alcohol (70% to 91%)
1) Protect the surrounding finish
- Clear the area so you can work without bumping the spill.
- Open a window if you’ll use any solvent.
- If the spot is near a seam or edge, place a dry cloth along the seam to catch runoff.
2) Gently pop off the bulk
Dried nail polish is often brittle. If it’s sitting on top of the finish, it may lift cleanly without much chemical help.
- Hold a plastic card nearly flat to the surface.
- Nudge under the edge of the polish and lift in tiny chips.
- Work from the outside toward the center to avoid dragging color outward.
If the polish won’t budge and seems fused to the surface, don’t force it. Move to softening and solvent steps.
3) Soften the edge (optional but useful)
- Lay a warm, slightly damp cloth over the spot for 30 to 60 seconds.
- Remove the cloth, dry the area, then try lifting again with the plastic card.
This step can help brittle polish release at the edges so you can reduce how much solvent you need later.
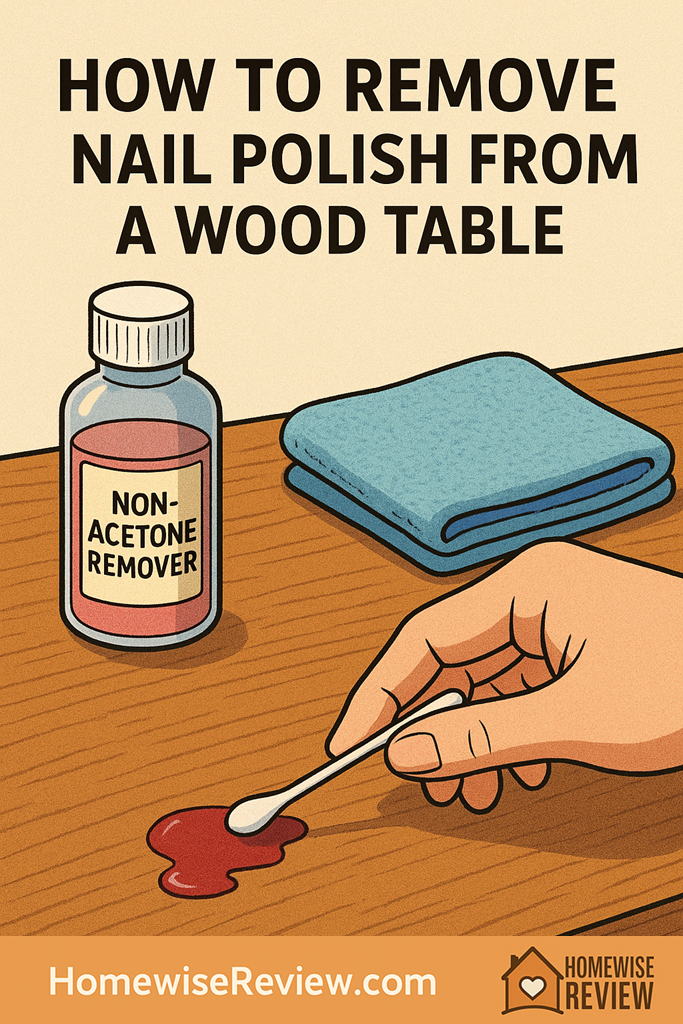
4) Use non-acetone remover with cotton swabs (the controlled method)
The biggest mistake is flooding the area. Instead, use a swab so the solvent only touches the polish, not the surrounding finish.
- Put a small amount of non-acetone remover on a cotton swab (damp, not dripping).
- Touch the swab to the polish for 5 to 10 seconds to soften it.
- Wipe the softened polish away with a clean cloth, using short strokes.
- Repeat with fresh swabs until the color transfers less and less.
- Finish by wiping with a cloth dampened in soapy water, then dry.
If the finish turns cloudy, dull, or tacky at any point, stop immediately and jump to the finish-recovery section below.
5) If there is still a stain-like shadow
A faint tint can be pigment caught in micro-scratches or a slight chemical change in the finish. Before escalating to acetone, try one careful pass with isopropyl alcohol if your finish tolerated the spot test.
- Dampen a fresh swab with rubbing alcohol.
- Lightly dab the remaining shadow for 3 to 5 seconds.
- Wipe dry right away and evaluate.
If you get improvement, keep going in short, controlled rounds. If not, stop. More solvent can turn a faint tint into a larger dull patch.
When (and how) to use acetone without wrecking the table
Acetone is effective, but it can soften or strip many finishes, especially lacquer. Use it only when you’ve confirmed your finish is durable enough and gentler methods failed.
Acetone rules that prevent most damage
- Spot test first: Always test acetone under the table edge.
- Use the smallest tool: Cotton swab beats cotton ball; a swab keeps the solvent contained.
- Short contact time: Touch, wait 2 to 5 seconds, wipe dry. Do not soak.
- Work in dots, not wipes: Dabbing reduces the chance you smear pigment across the finish.
- Keep it away from edges: Solvent that creeps under veneer or into joints can cause swelling or delamination.
Controlled acetone step sequence
- Ventilate the room and keep the solvent away from flames.
- Dab acetone onto the polish only (not the surrounding clear finish).
- As soon as the polish softens, lift it with a clean cloth or plastic card.
- Immediately wipe the area with a cloth lightly dampened with soapy water, then dry.
If the clear coat turns soft, sticky, or visibly dull, stop. At that point, removing the remaining polish is less important than preserving the finish you still have.
If the table looks hazy, dull, or sticky afterward
Cloudiness usually means the finish reacted to solvent or absorbed a little moisture. Stickiness suggests the finish is softening. Either way, the next steps are about stabilization and gentle correction, not aggressive scrubbing.
First, let it fully dry and harden
- Wipe the area dry and leave it alone for several hours (overnight is better).
- Avoid placing anything on the spot while it cures.
Then, evaluate what you see
- Light haze only: Often improves as the finish re-hardens.
- Dull patch: The top sheen may be scuffed or chemically etched.
- Sticky or soft: The finish is compromised and needs time; repeated solvents will make it worse.
Gentle recovery options
- For mild haze: After curing, buff gently with a clean microfiber cloth in the direction of the grain.
- For minor dullness: A small amount of furniture polish or wax that matches your finish can help blend sheen, but test in a hidden spot first.
- For sticky areas: Stop using cleaners and solvents. Let it cure 24 to 48 hours and reassess.
If the dull spot is large or the finish is peeling, you’re likely in touch-up territory (light sanding and re-coating). For veneer or heirloom pieces, a furniture pro is the safest option.
What not to use on nail polish stains on wood
Some popular hacks either do nothing to nail polish or cause more damage than the polish itself.
- Steel wool: It scratches finishes and can leave metal fibers that rust.
- Magic eraser-style abrasives: They can dull glossy finishes fast, even with gentle pressure.
- Knives or metal scrapers: Easy to gouge the clear coat and expose raw wood.
- Household bleach: Not effective on nail polish and can discolor wood and finishes.
- Vinegar: Too mild to dissolve polish; can etch some finishes if overused.
Special situations (painted wood, veneer, and bare wood)
Painted or stained and topcoated tables
Paint and stain can lift or smear if you use strong solvents. Treat these like delicate finishes: start with scraping and non-acetone remover, and stop early if color transfers to your cloth.
Veneer tops
Veneer is thin, and liquids that seep into seams can cause bubbling or lifting. Use minimal moisture, avoid soaking compresses, and keep solvents away from edges and joints.
Bare wood or worn-through finish
If polish soaked into raw wood fibers, solvents may spread pigment deeper. In that case, the cleanest fix is often mechanical: careful sanding of the stained fibers, then re-staining and re-sealing to match.
- If the area is small and the table is inexpensive, a spot repair can be doable.
- If it’s a large stain, a prominent tabletop location, or a hard-to-match finish, plan on refinishing help.
Prevent the next spill (fast, realistic habits)
- Create a quick barrier: Do nails over a folded towel or silicone mat, not directly on the table.
- Cap first: Put the cap back on between coats to reduce tip-overs.
- Keep remover separate: Store remover and polish in a small bin so leaks do not reach wood surfaces.
- Use a coaster-sized tray: A small dish under the bottle catches drips.
Bottom Line
Start with the least aggressive approach: lift what you can with a plastic edge, then use tiny, controlled dabs of non-acetone remover to dissolve what’s left. Save acetone for true last-resort situations and only after a hidden spot test, because the wrong solvent can haze or strip the table’s finish.
See also
If you want help choosing the safest next step based on what you’re seeing, use our stain-rescue decision tree for quick steps and tips.
- Best non-toxic cleaning products for families
- Method all-purpose cleaner review (is it a good everyday option?)
- Scrub Daddy sponges review: when a gentle scrubber helps and when it hurts
- How to remove crayon from common household surfaces
Frequently Asked Questions ▾
Can I use nail polish remover on a wood table?
Sometimes, but it depends on the finish. Non-acetone remover used sparingly with cotton swabs is the safest starting point on many sealed tables. Acetone-based remover can haze, soften, or strip finishes like lacquer and shellac, so it should be a last resort after a hidden spot test.
Will acetone ruin polyurethane?
Polyurethane is generally more solvent-resistant than lacquer or shellac, but acetone can still dull or soften it if it sits too long or if you flood the area. If you use acetone, keep contact time to a few seconds, use a swab, and wipe dry immediately.
How do you remove glitter nail polish from wood?
Glitter polish is tougher because the particles can catch in tiny scratches. Focus on lifting the bulk mechanically first (plastic card), then dissolve remaining binder with controlled dabs of non-acetone remover. Avoid scrubbing, which can grind glitter into the finish and leave swirl marks.
What if the nail polish stain is in the wood grain?
If pigment has soaked into bare wood or into a worn-through spot, solvents can spread it. At that point, careful sanding and refinishing is often the cleanest fix. If the table is veneer or valuable, consider professional repair to avoid sanding through the surface layer.
Why did the spot turn cloudy after cleaning?
Cloudiness usually means the finish reacted to solvent or absorbed a bit of moisture. Let it cure and dry fully first, then buff gently with a microfiber cloth. If the haze or dullness remains, the finish may be etched and might need a light polish, wax, or touch-up depending on the table’s finish.
As an Amazon Associate, we earn from qualifying purchases made through links on our site.